
Kuler Color Change
by Jen White
Use Adobe Kuler color swatches to quickly change the colors of an element set to perfectly coordinate.
Note: This tutorial was written for Adobe Photoshop and Photoshop Elements.
Step One: Open an Element
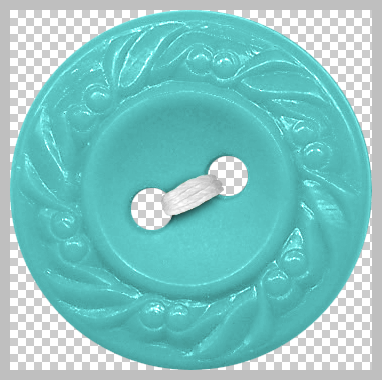
- Open an element.
I am using a button from Carefree by Amanda Heimann. Download the button to follow along.

Step Two: Download and Load a Kuler Color Swatch Set
- Go to the Adobe Kuler website and browse the color swatches.
- Download a swatch set you like.

- In the Color Swatches panel (Window > Color Swatches), click on the flyout menu and choose Load Swatches. (PS: Choose Window > Swatches.)
- Navigate to the swatches you downloaded and click Open.
The newly loaded swatches should appear at the bottom of the Color Swatches panel.
Step Three: Add a Color Adjustment Layer
- In the Layers panel, click on the Create New Fill or Adjustment Layer icon and choose Solid Color.
- Move the Color Picker aside so you can clearly see the Color Swatches panel.
- In the Color Swatches panel (PS: Swatches panel), click on one of the new color swatches.
- Click OK to close the Color Picker.

- In the Layers panel, set the Blend Mode to Color.
This should have changed the color of the element but allowed all the shadows and highlights to show through.

Step Four: Mask Away Color
- Get the Brush tool.
- In the Tool Options, open the Brush Picker and choose a hard round brush. Set the Size to 20 px and the Opacity to 100%. Set the Mode to Normal.
- In the Layers panel, click on the layer mask icon of the Color Fill layer to activate it.
- Press the letter D to reset the Color Chips to white over white.
- Press the letter X to make black the Foreground Color Chip.
- On the image, click and drag over areas where you do not want the color change to show. (For example, the thread.)

Step Five: Adjust the Color
Some colors need a little extra tweaking to come out just right and some don’t. This adjustment will help you make the color lighter or darker.
- In the Layers panel, click on the element layer to activate it.
- Click on the Create New Fill or Adjustment Layer icon and choose Brightness/Contrast.
- In the Brightness/Contrast panel (Properties panel), move the Brightness slider to left or right to achieve the look you are after.
- Move the Contrast slider to the right to add contrast.
- In the Layers panel, hold down the Alt key (Mac: Opt key) and click and drag the layer mask from the Color Fill layer to the Brightness/Contrast layer. If asked to Replace the Layer Mask, click Yes.
Step Six: Save With a Unique Name
- Save the element (File > Save As) as a PNG file with a unique name.
- Close the original element without saving.
Download the PDF Manual for this lesson.
